Difference between revisions of "Introduction and basic setup - Almond 2012"
| (16 intermediate revisions by one user not shown) | |||
| Line 1: | Line 1: | ||
| − | [[Category:Almond 2012]] | + | [[Category:User Manual - Almond 2012]] |
| − | + | This chapter of the manual will give you a basic overview of your Almond router, as well as help you get it connected to the internet, either as a router, a range extender/repeater, access point or wireless bridge. | |
| − | + | ||
| − | + | ||
| − | + | ||
| − | + | ||
| − | + | ||
| − | + | ||
| − | + | ||
| − | + | ||
| − | + | ||
| + | __TOC__ | ||
| + | == Getting to know your Almond 2012 == | ||
On the front of your Almond you’ll find the touchscreen. It’s used to configure most of the settings of the Almond. Most of the instructions in this | On the front of your Almond you’ll find the touchscreen. It’s used to configure most of the settings of the Almond. Most of the instructions in this | ||
quick start guide will revolve around the touchscreen interface. On the right hand side you’ll find three network ports. The grey port should be | quick start guide will revolve around the touchscreen interface. On the right hand side you’ll find three network ports. The grey port should be | ||
| Line 22: | Line 15: | ||
The stylus can be used to help you enter information on the touchscreen and it can be particularly useful when it comes to entering passwords and other text during the initial configuration of your Almond. | The stylus can be used to help you enter information on the touchscreen and it can be particularly useful when it comes to entering passwords and other text during the initial configuration of your Almond. | ||
| − | == | + | == Range Extender/Repeater mode == |
<ol style="list-style-type:lower-roman"> | <ol style="list-style-type:lower-roman"> | ||
Latest revision as of 03:09, 18 April 2014
This chapter of the manual will give you a basic overview of your Almond router, as well as help you get it connected to the internet, either as a router, a range extender/repeater, access point or wireless bridge.
Getting to know your Almond 2012
On the front of your Almond you’ll find the touchscreen. It’s used to configure most of the settings of the Almond. Most of the instructions in this quick start guide will revolve around the touchscreen interface. On the right hand side you’ll find three network ports. The grey port should be connected to the internet if you’re using your Almond as a router. This might be a via a network cable to a fiber service, to a cable modem, to an xDSL modem or some other kind of device provided by your internet service provider.i
The two black ports can be used to connect wired internet devices such as a PC, Mac, games console, set-top-box or just about anything else that requires a wired connection to the internet. Note that these ports also function when the Almond is configured as Wireless Range Extender (Repeater) and as a Wireless Access Point and will allow you to connect wired as well as wireless devices to the Internet.
Just below the network ports you’ll find a reset button, a power socket and a slot in which the stylus is located.
The stylus can be used to help you enter information on the touchscreen and it can be particularly useful when it comes to entering passwords and other text during the initial configuration of your Almond.
Range Extender/Repeater mode
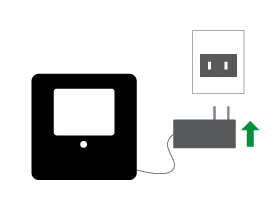
- Plug the AC adapter of your Almond into a power outlet.

- Please wait for your Almond to power up
- At this point, please select the language you want to use when you access the Almond’s touchscreen and Web UI (Note: The language can be changed via the icon in the top right corner of the touch screen at any point).