Difference between revisions of "Android App"
| Line 1: | Line 1: | ||
| − | [[Category: | + | [[Category:Cloud Applications]] |
Please find some helpful information regarding the Android app. | Please find some helpful information regarding the Android app. | ||
Revision as of 11:12, 8 August 2017
Please find some helpful information regarding the Android app.
--> Adding a New User:(In order to block or schedule internet access, creating a User Account is mandate)
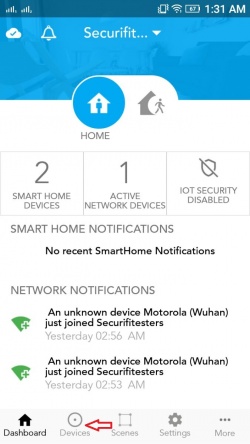
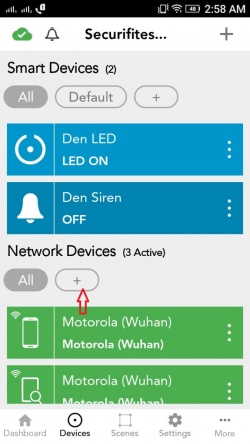
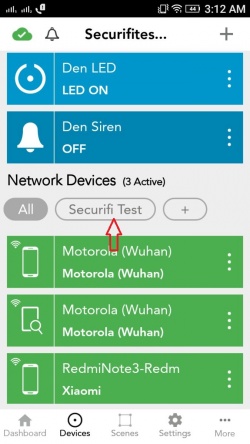
Select the “Devices” tab then under "Network Devices" (depending on number of Smart Devices you may need to scroll down) tap on "+".
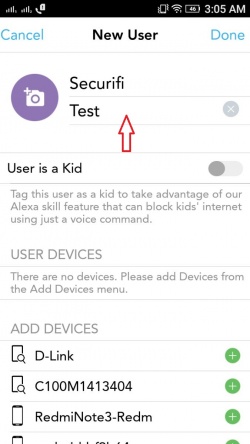
Enter the First Name (and optionally the Last Name). You can also upload an image of the user.
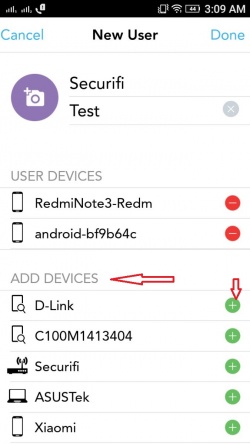
Now select the network devices for that user from the list of unassigned devices.
Once the user is created, the user’s name will appear under "Network Devices".
--> Block/Schedule Network Access for Users:
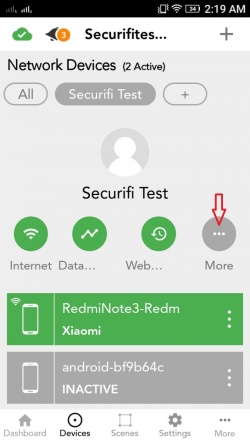
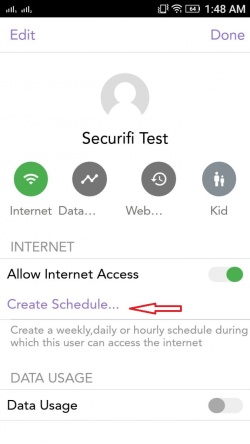
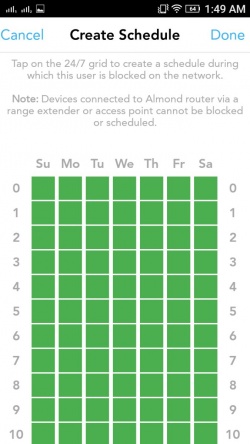
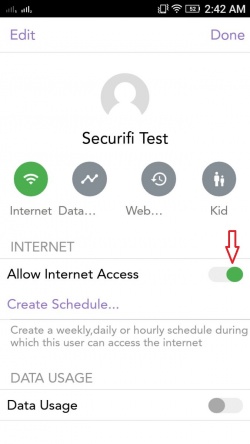
Tap on Devices-->User Account-->More and then tap on "Create Schedule" option to schedule the network access for that user.
Note: In order to block the Network devices then turn off "Allow Internet Access"
--> How to Subscribe IoT Security:
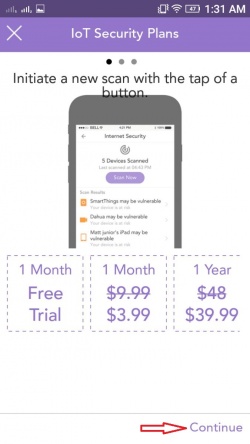
Note: IoT Security is only available on Almond A1A, Almond 2015 and Almond 3 at this time. There is a 30 days free trial for the first time users.
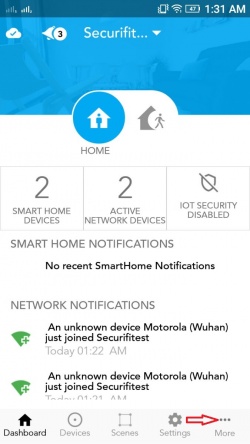
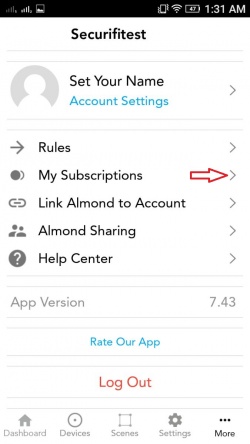
Select the “More” tab then tap on “My Subscriptions”.
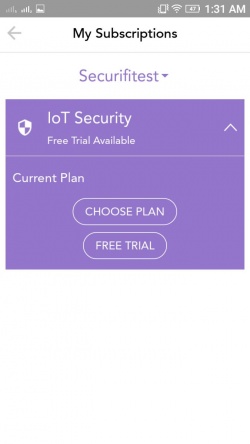
Tap the “IoT Security” drop down arrow and choose a plan (Free Trial, 1 Month, 1 Year).
Tap on continue and complete sign up.
--> Enabling Data Usage and Web History for a User:
Note: Data Usage option will not work in Access Point mode and Range Extender mode.
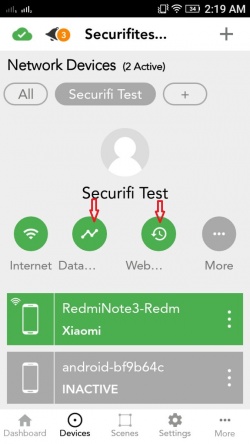
Select the “Devices” tab then under “Network Devices” tap on the user.
Tap on the “Data Usage” and “Web History” icons to turn them ON if they are not already.
--> How to View a User’s Data Usage and Web History:
Note: Data Usage option will not work in Access Point mode and Range Extender mode.
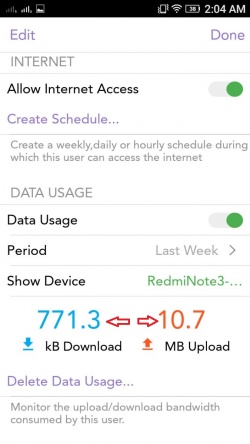
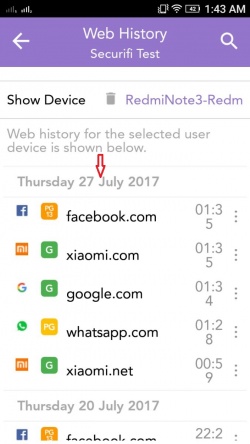
Select the “Devices” tab then under “Network Devices” tap on the user.
Tap on “More” to see the “Data Usage” and “Web History”
--> How to Copy 2.4 GHz Settings to 5 GHz:
Note: This feature is available only on Almond 3 at this time.
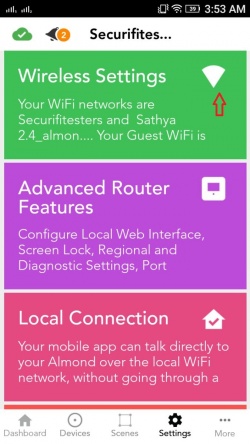
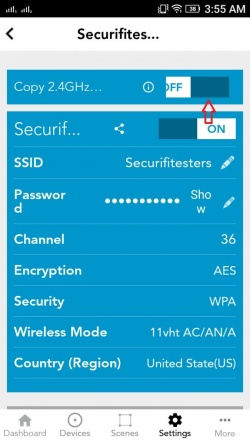
In the Almond app, select the “Settings” tab then select “Wireless Settings” to see an option “Copy 2.4 GHz settings”. If you turn it ON, 2.4 GHz settings like network name, password, security and encryption will be copied to 5 GHz. This feature can help create a seamless network for devices that are compatible with 2.4 GHz and 5 GHz networks.
--> How to Turn on Guest Network:
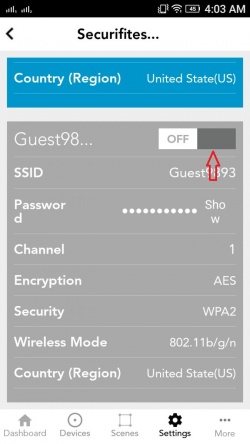
Note: Guest network is only available when the Almond is in Router mode. In the Almond app, select the “Settings” tab then select “Wireless Settings”. Scroll down to the bottom of the page and you will see the option to Turn ON/OFF the Guest network.
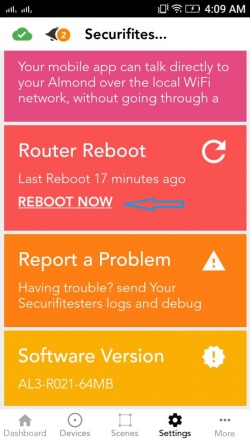
--> How to Reboot:
Select the “Settings” tab then scroll down to “Router Reboot”. Tap on “REBOOT NOW” to reboot the device.
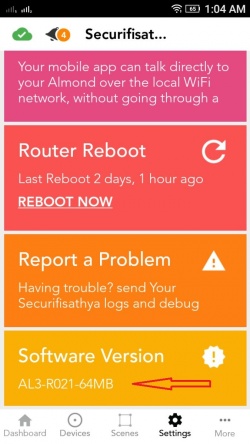
--> How to Check the Software Version:
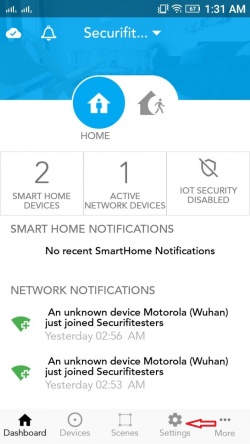
Select the “Settings” tab then scroll down to view the Software Version of the Almond.
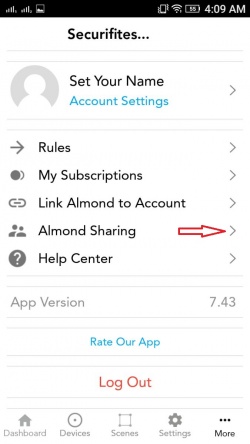
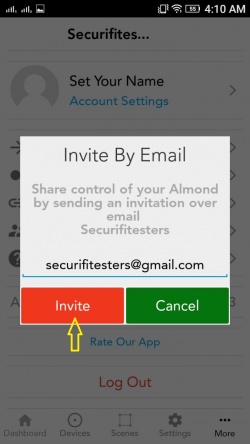
--> How to Share Your Almond With Others:
Select the “More” tab then select “Almond Sharing”. Enter an email address and tap on “Invite”. The user will receive an invite to control the Almond as if it was their own using the Almond app.
Note: The person invited must have installed the Almond app and be registered.
