How to add Securifi ZigBee sensors - Almond+ 2014
This quick guide will help you add the Securifi sensors to your Almond+.
Adding other sensors will be similar, but might differ slightly depending on the manufacturer, so please check the included documentation with the sensor.
Contents
Common steps
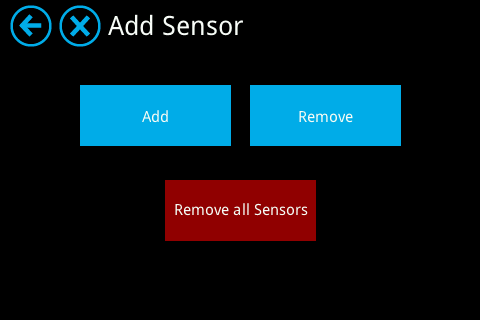
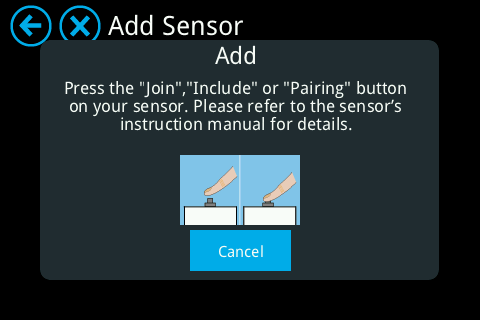
Tap on Add Sensor in the LCD UI of your Almond+, then tap on Add.
You should now see the following screen.
Depending on the sensor you want to add, follow the steps below for each specific sensor.
Sensor specific steps
Door/Window sensor – SZ-DWS02
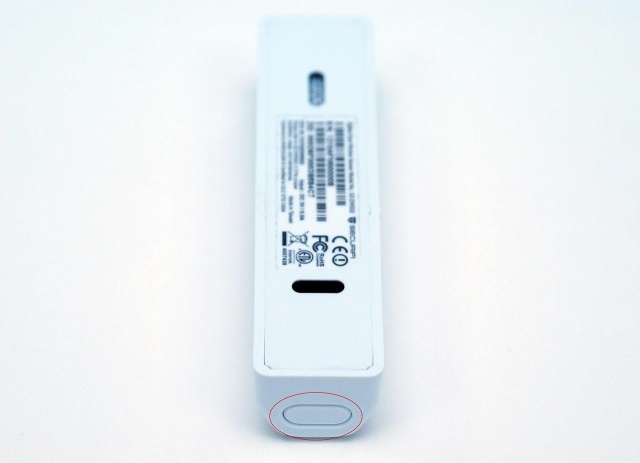
Start by removing the back of the door/window sensor. This is done by pushing the button marked in the image below and then lifting the back of the door/window sensor upwards.
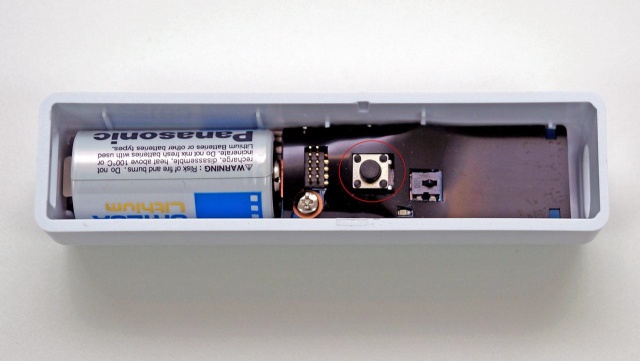
With the back of the sensor removed, simply press the button that’s highlighted in the picture below to initialize the association process.
PIR Sensor – SZ-PIR02
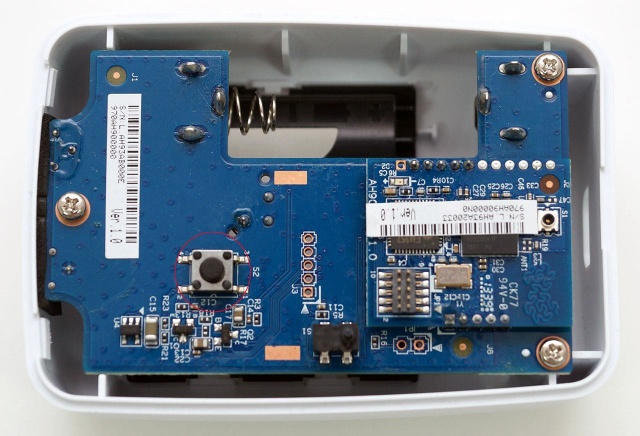
Start by removing the back of the PIR sensor. This is done by pushing the button marked in the image below and then removing the back of the PIR sensor by lifting it outwards.
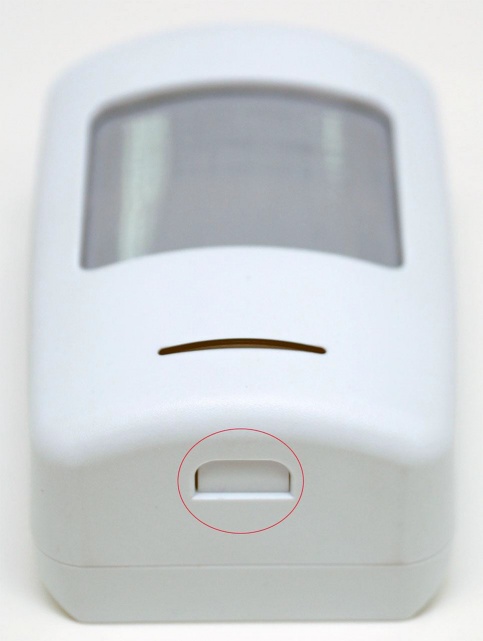
With the back of the sensor removed, simply press the button that’s highlighted in the picture below to initialize the association process.
Binary on/off switch – SZ-BSW01
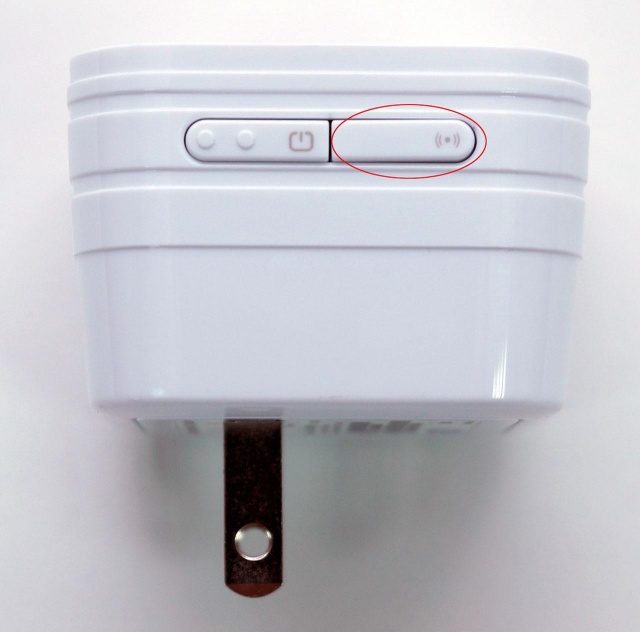
The binary on/off switch has its association button located on the side of the device and as such there’s no need to open it to associate it with your Almond+.
Simply press the button that’s highlighted in the picture below to initialize the association process. The second button is for manual on/off switching of the device.
Flood/water sensor – SZ-WTD01
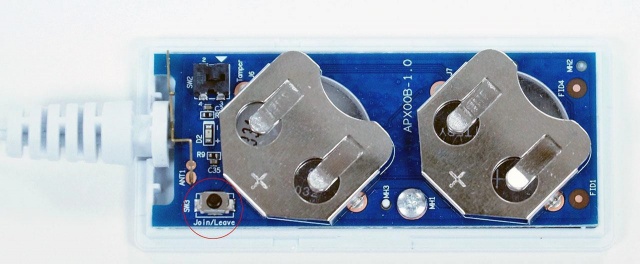
Start by removing the back of the flood/water sensor. This can be a bit tricky, as you need a flat head screwdriver or something similar to pry open the casing with.
There are two slots, one on each side, which will help make this easier. You might want to slide something between the lid and the bottom part of the sensor to make it easier to open once you’ve got an opening between the two parts.
With the top of the sensor removed, simply press the button that’s highlighted in the picture below to initialize the association process.
Final step
Make sure you've replaced the cover on the sensor, this is so the tamper switch doesn't report the sensor as tampered, since as long as the sensor is in the tampered state, it will not report any other status updates, such as open or closed for example.
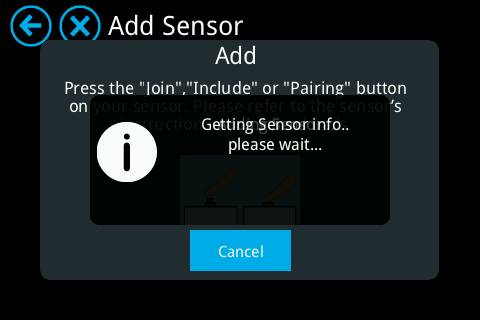
The Almond+ will query the sensor to ascertain its type and variables. The time it takes to add sensors varies from around 10 to 30 seconds.
You'll be seeing the message below during the time the sensor is being added.
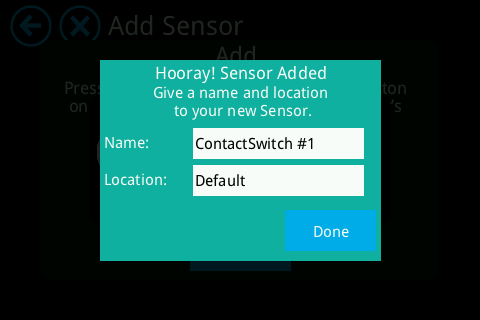
Once the sensor is added to the Almond+, you should see a screen similar to the one below. Tapping in either text box will allow you to change the name and location of the sensor.
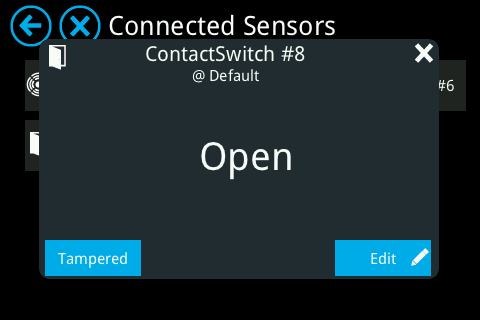
Finally go into Connected Sensors in the LCD, locate the sensor you just added in the list and tap on it.
You should now see something similar to the screenshot below.
Please tap on Tampered to reset the tamper switch notification which is triggered when the sensor is opened. Without doing so, the sensor will not work properly.
This does not apply to sensor that don't have a tamper switch.
You can also test that the sensor is working here, either by triggering it, or by switching it on/off etc.
Resetting a sensor
If for some reason one or more of your sensors have been disconnected from your Almond+, for example if you've selected to remove them within the Connected Home app, then you'll have to reset them before you can add them to the Almond+ again. This is done by pressing the highlighted button above for 10 seconds. You should see the LED flash green once if the reset was successful. You can now go ahead and follow the instructions above on how to add the sensor again.
